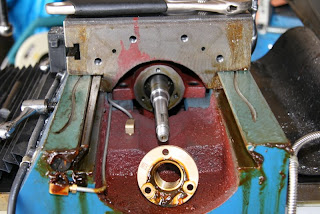
Taking another step toward converting my mill to CNC control, I decided this to take a closer look at the nut on the X axis with a view to seeing how easy it would be to replace/augment. (The idea being to remove backlash out of the system).
This is a little trickier than it would normally be because my mill has an X-Y digital readout, with the optical encoders bolted to the mill. These needed to be removed as the table was being moved beyond the normal limits to expose the nut.
 Being an idiot, I look at the end with the power feed and said "Hmm. Looks complicated, let's leave that alone".
So I started with this end. After about 30 minutes of mucking around, it become abundantly clear that this was the end with the thrust bearings; I.e. the complex end. The end that's relatively high precision. And with the benefit of hindsight, it was obvious that the power feed would be fitted to the end that's easiest to fit to. Doh.
 So back to the powerfeed end, it disassembled much more easily. This is after removing the retaining nut, handle, and feed cog. Nice simple mechanism.
The power feed just sits on roller bearing (no thrust bearing required) and so is very easy to remove after clearing the keyway.
 And there's the acme nut. Piece of cake. Interestingly, it turns out there's two of them (another on the other side), so removing the backlash looks very easy. Just mill some slots in the nut, and turn it to adjust the degree of slop.
 Preparing to mill the nut. It's just centered and clamped onto a small rotary table. I'm using a 4 flute 6mm bit. The slots will be 7mm wide, but I didn't have a 7mm to hand, and I can just cut one side of the slot at a time.

No comments:
Post a Comment